All Jarred Up
Repurposing Glass Jars


Finally, I took some glue and painted it on the back of a piece of ribbon and attached it to the rim of the jar. This step will no longer allow the lid to screw on and off but rather set on top the jar and just lift up. Again, had I used a regular knob for this project, I would have let it stay a screw on. But it's for personal use and it turn out nice. The great thing about crafting is that you can always change it later!


Hey fellow crafters! It's Jessica from This - N - That Furniture and Crafts!
Don't throw away your glass jars! Instead repurpose them and give them new life! I've been watching tutorials and many other blog sites that have done this and let me tell you how stinking cute this idea is.
I confess that I am a Pinterest junkie and have probably saved this ideas a thousand times!
Anyway, I decided I wanted some of these cute jars to put in my bathroom for cotton balls and q-tips because lets face it, those bags and boxes are just ugly and I'm forever fighting with my drawers because it always seems like they are forever getting stuck. Such a pain!
You can update any room for practically nothing with this cute craft, I mean you probably have a couple of jars in your cabinet right now! These also make great gifts! The possibilities are endless!
I've included pictures of some of the items I used in my glass jar craft. Feel free to use anything your heart desires. This just happened to be what I had on hand.
Materials needed:
- Glass jar/jars with lids
- Some sort of base (I used a candlestick holder I found at the Dollar Tree)
- tissue paper/napkins (depending on what you want or have on hand)
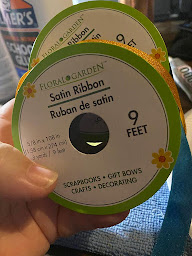
- Ribbons
- Elmer's glue (I did not have mod podge at the time)
- A varnish or protectant
- Gorilla glue
- Paint brushes
- Screw driver or drill
- Knobs (I used some glass beads and jewelry wire for one of the lids because that is what I had) I also had an old lid from a broken glass jar and took the knob from it.
To begin you will need to clean and remove the labels from the jars to have a clean and clear work surface. An easy way in removing labels from your glass jars can be found on this post.
If it looks like I'm jumping ahead and skipping steps, I assure you I'm not. I did not include a picture of the jar without the base mainly because I forgot but you get the idea. When you come to that step just make sure you use a strong holding glue like Gorilla glue and apply a thin ring around the base of the jar or to the top of the candlestick holder and center your base to the jar and let dry for at least 24 hours.
Next, I watered down some Elmer's glue and used a paint brush to apply the glue to my jar. I had precut some of my tissue paper into sections so I could just grab them and place them on the wet glue. While still wet I took my saturated paint brush to go over the tissue paper and smooth out any wrinkles there might had been. I then allowed that to dry before painting a coat of the varnish to seal it all in.
This picture is the base being attached to the jars. I let them dry upside down so the weight of the candlestick would be pressing into the glue. (Excuse the game in back on my computer, got to do something in between drying times, am I right?)
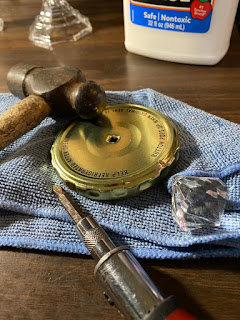
To make the knob for the lid I took a screw driver and a hammer and punched a hole in the center of the lid and ran a glass bead on a piece of jewelry wire and knotted it off underneath the lid. I went the extra step and attached a dab of hot glue under the lid to hold the wire in place. Again this is what I had on hand but I recommend getting actual knobs to use for this project for better stability.
Make sure you make your hole and prep work for your knob before you paint or decorate your lid.
Once they are nice a dry I simply used my Word program on my computer and printed out how I wanted my words to look and then cut them out and placed a piece of clear packing tape over them and then let them sit in some water for about 2 minutes. Next, I gently rubbed the paper off of the tape only leaving the words behind. Surprisingly, once dry the tape is still sticky and you can just simply attached them onto your jars without difficulty.
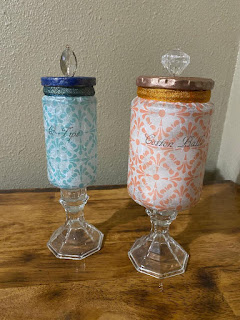
And there you have it! All done! I think they turned out quite nice. I hope I inspired you to get creative with your glass jars. The possibilities are endless.
Another example of a glass jar done with a 3-ply napkin.
Don't forget to subscribe so you don't miss out on my crafty shenanigans! Until next time, stay crafty my friends!


Comments
Post a Comment